Hello:
I'm posting this very late, and I have to get up early tomorrow because I have a 7 am dentist appointment! I thought I was going to have all day to knit and get ahead on this scarf, then, at about 9:15 am I was called in to substitute teach in a second grade classroom. If I have energy tomorrow, I will write about it later. For now, onto The Scarf.
The pattern for Day 9 has 3 stitches that are new to me. I did tutorials for them, but as I was knitting, I changed the way I was knitting the stitches a bit. I think it looks the same, and for me, my way is faster.
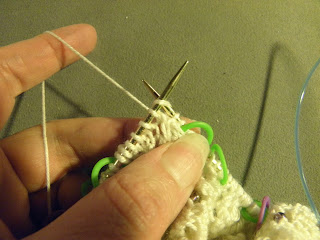
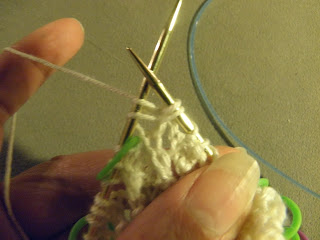
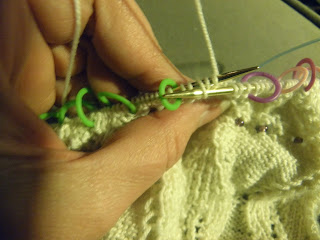
The tutorial photos are not the greatest, sorry about that. I hope you can see what I am doing even with the bad lighting.
Tutorials
\\ LT Left Twist
This is how the pattern instructions say to do the stitch:
1. skip 1 stitch and knit the 2nd through the back loop; don't slip the stitch off the left needle.
I did this a bit differently than the directions. This is how I did this twist:
1. skip the first stitch on the left needle, and working behind, insert the right needle into the back loop of the 2nd stitch.
2. Knit the 2nd stitch through the back look, but do not slip it off the left needle.
3. Knit the 1st stitch as normal.
4. slip the 2 stitches off the left needle.
// RT Right Twist
This is how the pattern instructions say to do the stitch:
1. k2tog, leaving the stitches on the left needle
2. insert right needle between the stitches just knitted together
3. and knit the first stitch on the needle again,
4. slip both stitches from the left needle.
This is how I did the stitch. It is done much like the LT.
1. skip the first stitch on the left needle, and working in front, knit the 2nd stitch, but don't slip the stitch off the left needle.
2. knit the first stitch.
3. slip both stitches off the left needle.
/-\ 1 over 1 cross
I don't have a tutorial for this explaining how the pattern does it. I did this stitch without a cable needle. Here is how I did this stitch:
1. with needle held in front of first 2 stitches, insert right needle in the 3rd stitch .
2. slip the 3 stitches off the left needle. Stitch 3 will be on the right needle and stitches 1 and 2 will be loose, then pick up the two dropped stitches with the left needle. The right needle with stitch 3 should be in front.
4. slip stitch 3 back on the left needle. You have changed the order of the three stitches, and stitch 3 is now first.
5. knit the first stitch.
6. skipping the first stitch on the left needle, and working behind, insert right needle into the 2nd stitch through the back loop. Knit that stitch (through the back loop), but do not slip that stitch off the left needle
7. knit the first stitch on the left needle and slip both stitches off the left needle. (you have completed a right twist stitch with these 2 stitches).
The three stitches should look like they were knit in this order: Stitch 3 will be in front, Stitch 1 will be next, and the back most stitch is Stitch 2. Or, Stitches 3 and 1 form an X over Stitch 2.
Hope this makes sense. I find this much faster than fiddling with a cable needle.
I hope these tutorials are helpful. Let me know if I can do anything to make them more useful.
Peace,
f1bercat
shaping the planet with merino/silk fingering weight.


No comments:
Post a Comment